Hello. My name is Mr. Linen.
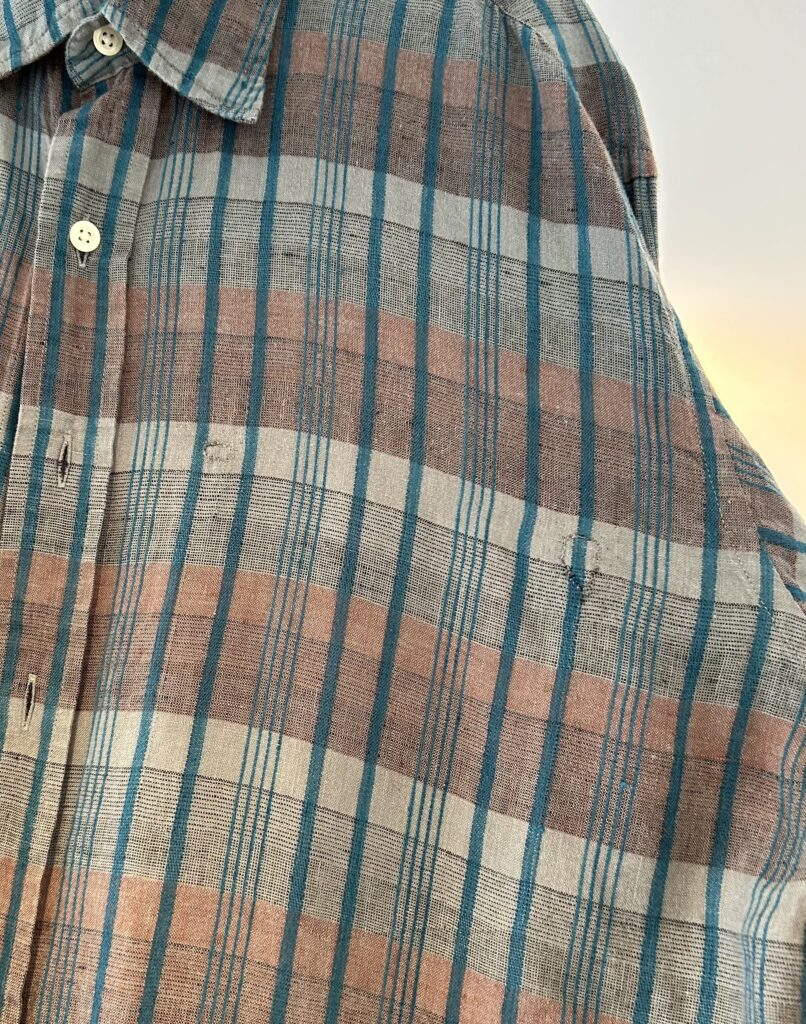
For those who enjoy classic dressing, it may be common sense that “a classic dress shirt has no chest pocket.”
I imagine many of you have found a ready-made shirt you like, only to notice it has a chest pocket and thought, “That’s annoying.”
目次
Chest pockets can be removed
So here is my suggestion. If it bothers you, just remove it.
I have actually removed the chest pockets from many shirts over the years.
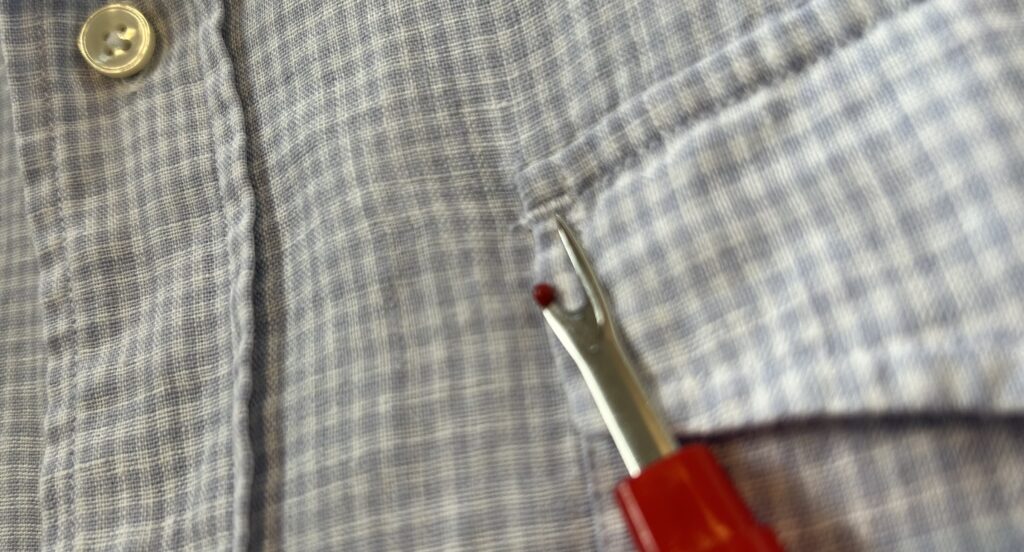
Removing a chest pocket is surprisingly easy. All you need is a tool called a seam ripper, which you can find easily.
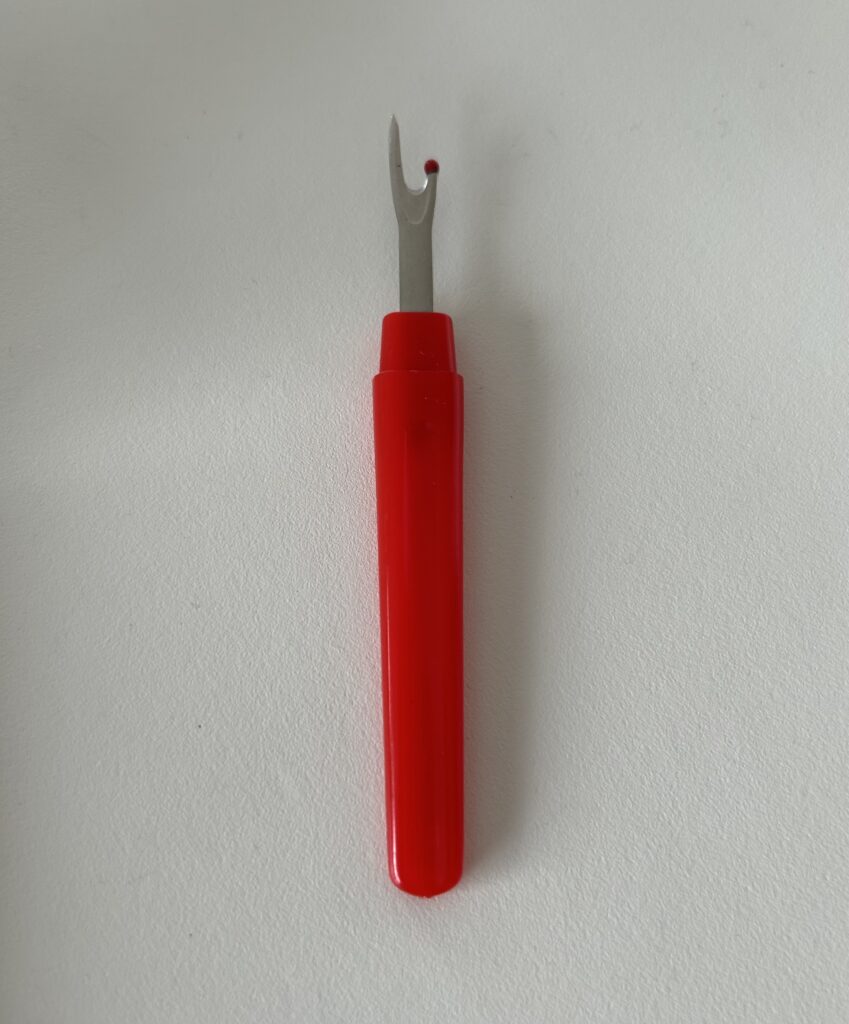
After that, all you have to do is carefully cut the threads. The top edge is sewn extra firmly for strength, so it can be a bit tricky, but even an amateur like me can do it without any problems.
I recommend removing the pocket when the shirt is brand new and has never been washed. Let me explain why.
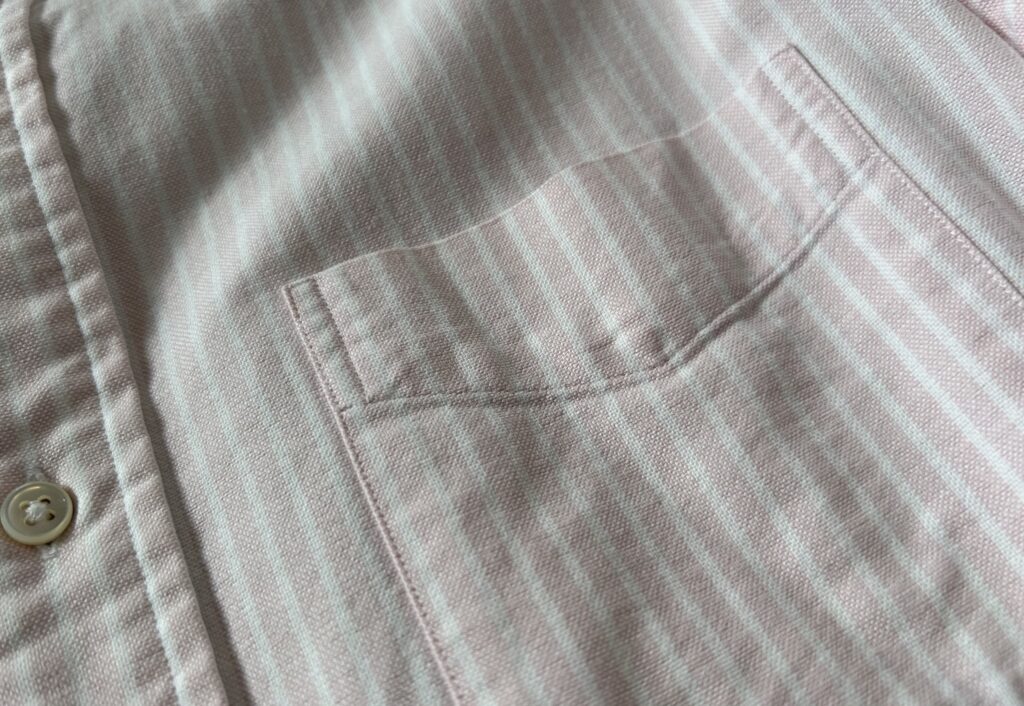
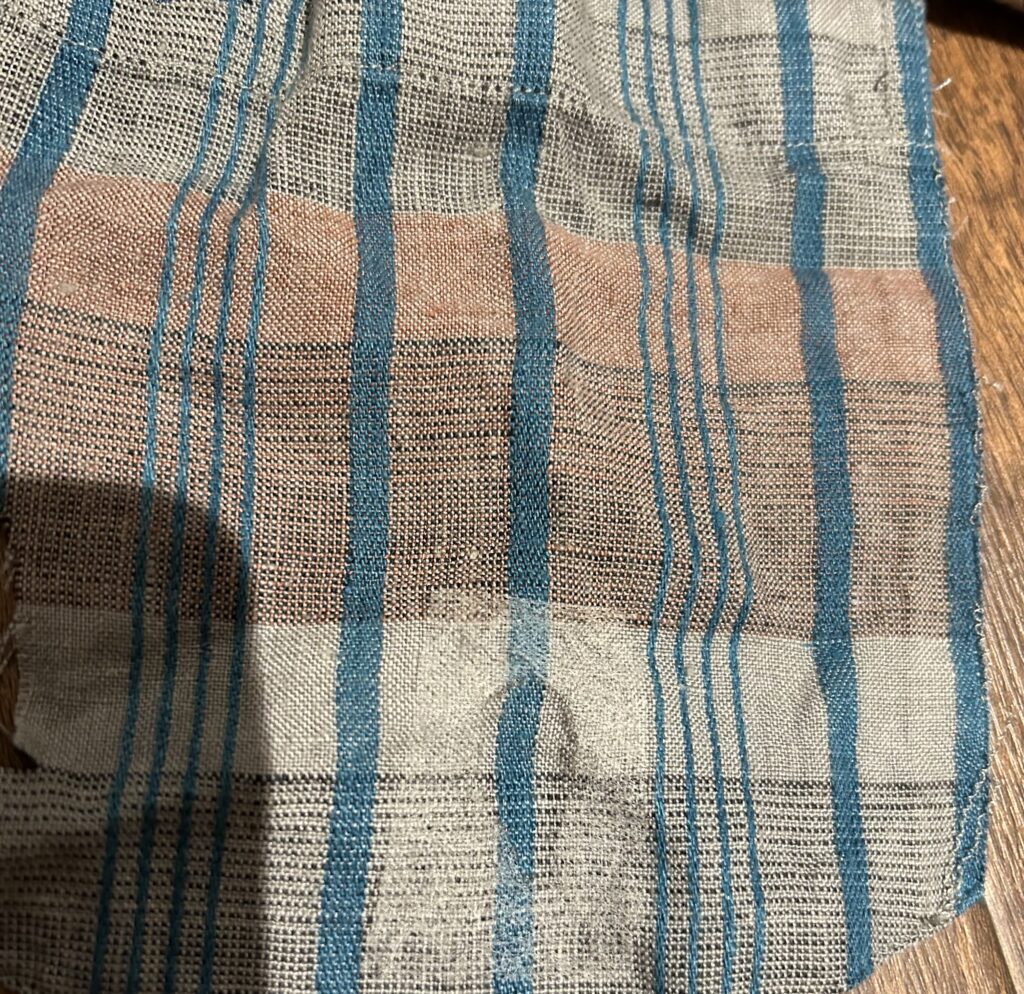
When you completely remove a chest pocket, tiny holes remain where the threads originally passed through. When viewed up close, you will see many small holes tracing the outline of the pocket stitching.
To make those holes disappear, one wash is usually enough.
When a shirt is washed, the weave of the fabric tightens. As the weave tightens, the holes created by removing the pocket become almost unnoticeable.
Removing the pocket from a shirt that has already been washed means creating holes in fabric whose weave has already tightened to some extent.
Because the weave is already tight, washing it again will not tighten it much further, making the holes harder to close.
That said, don’t worry too much. I have actually removed pockets from shirts that had already been washed, and after several more washes, the marks became barely noticeable.
Besides, it is rare for someone to stare closely at your chest, so even if some traces remain, I don’t think it’s a real problem.
Danger: do not touch this chest pocket!
Feeling confident that removing chest pockets was easy, I kept buying shirts with chest pockets and removing them over and over again.
But recently, I caused a major incident.
This is what happened.


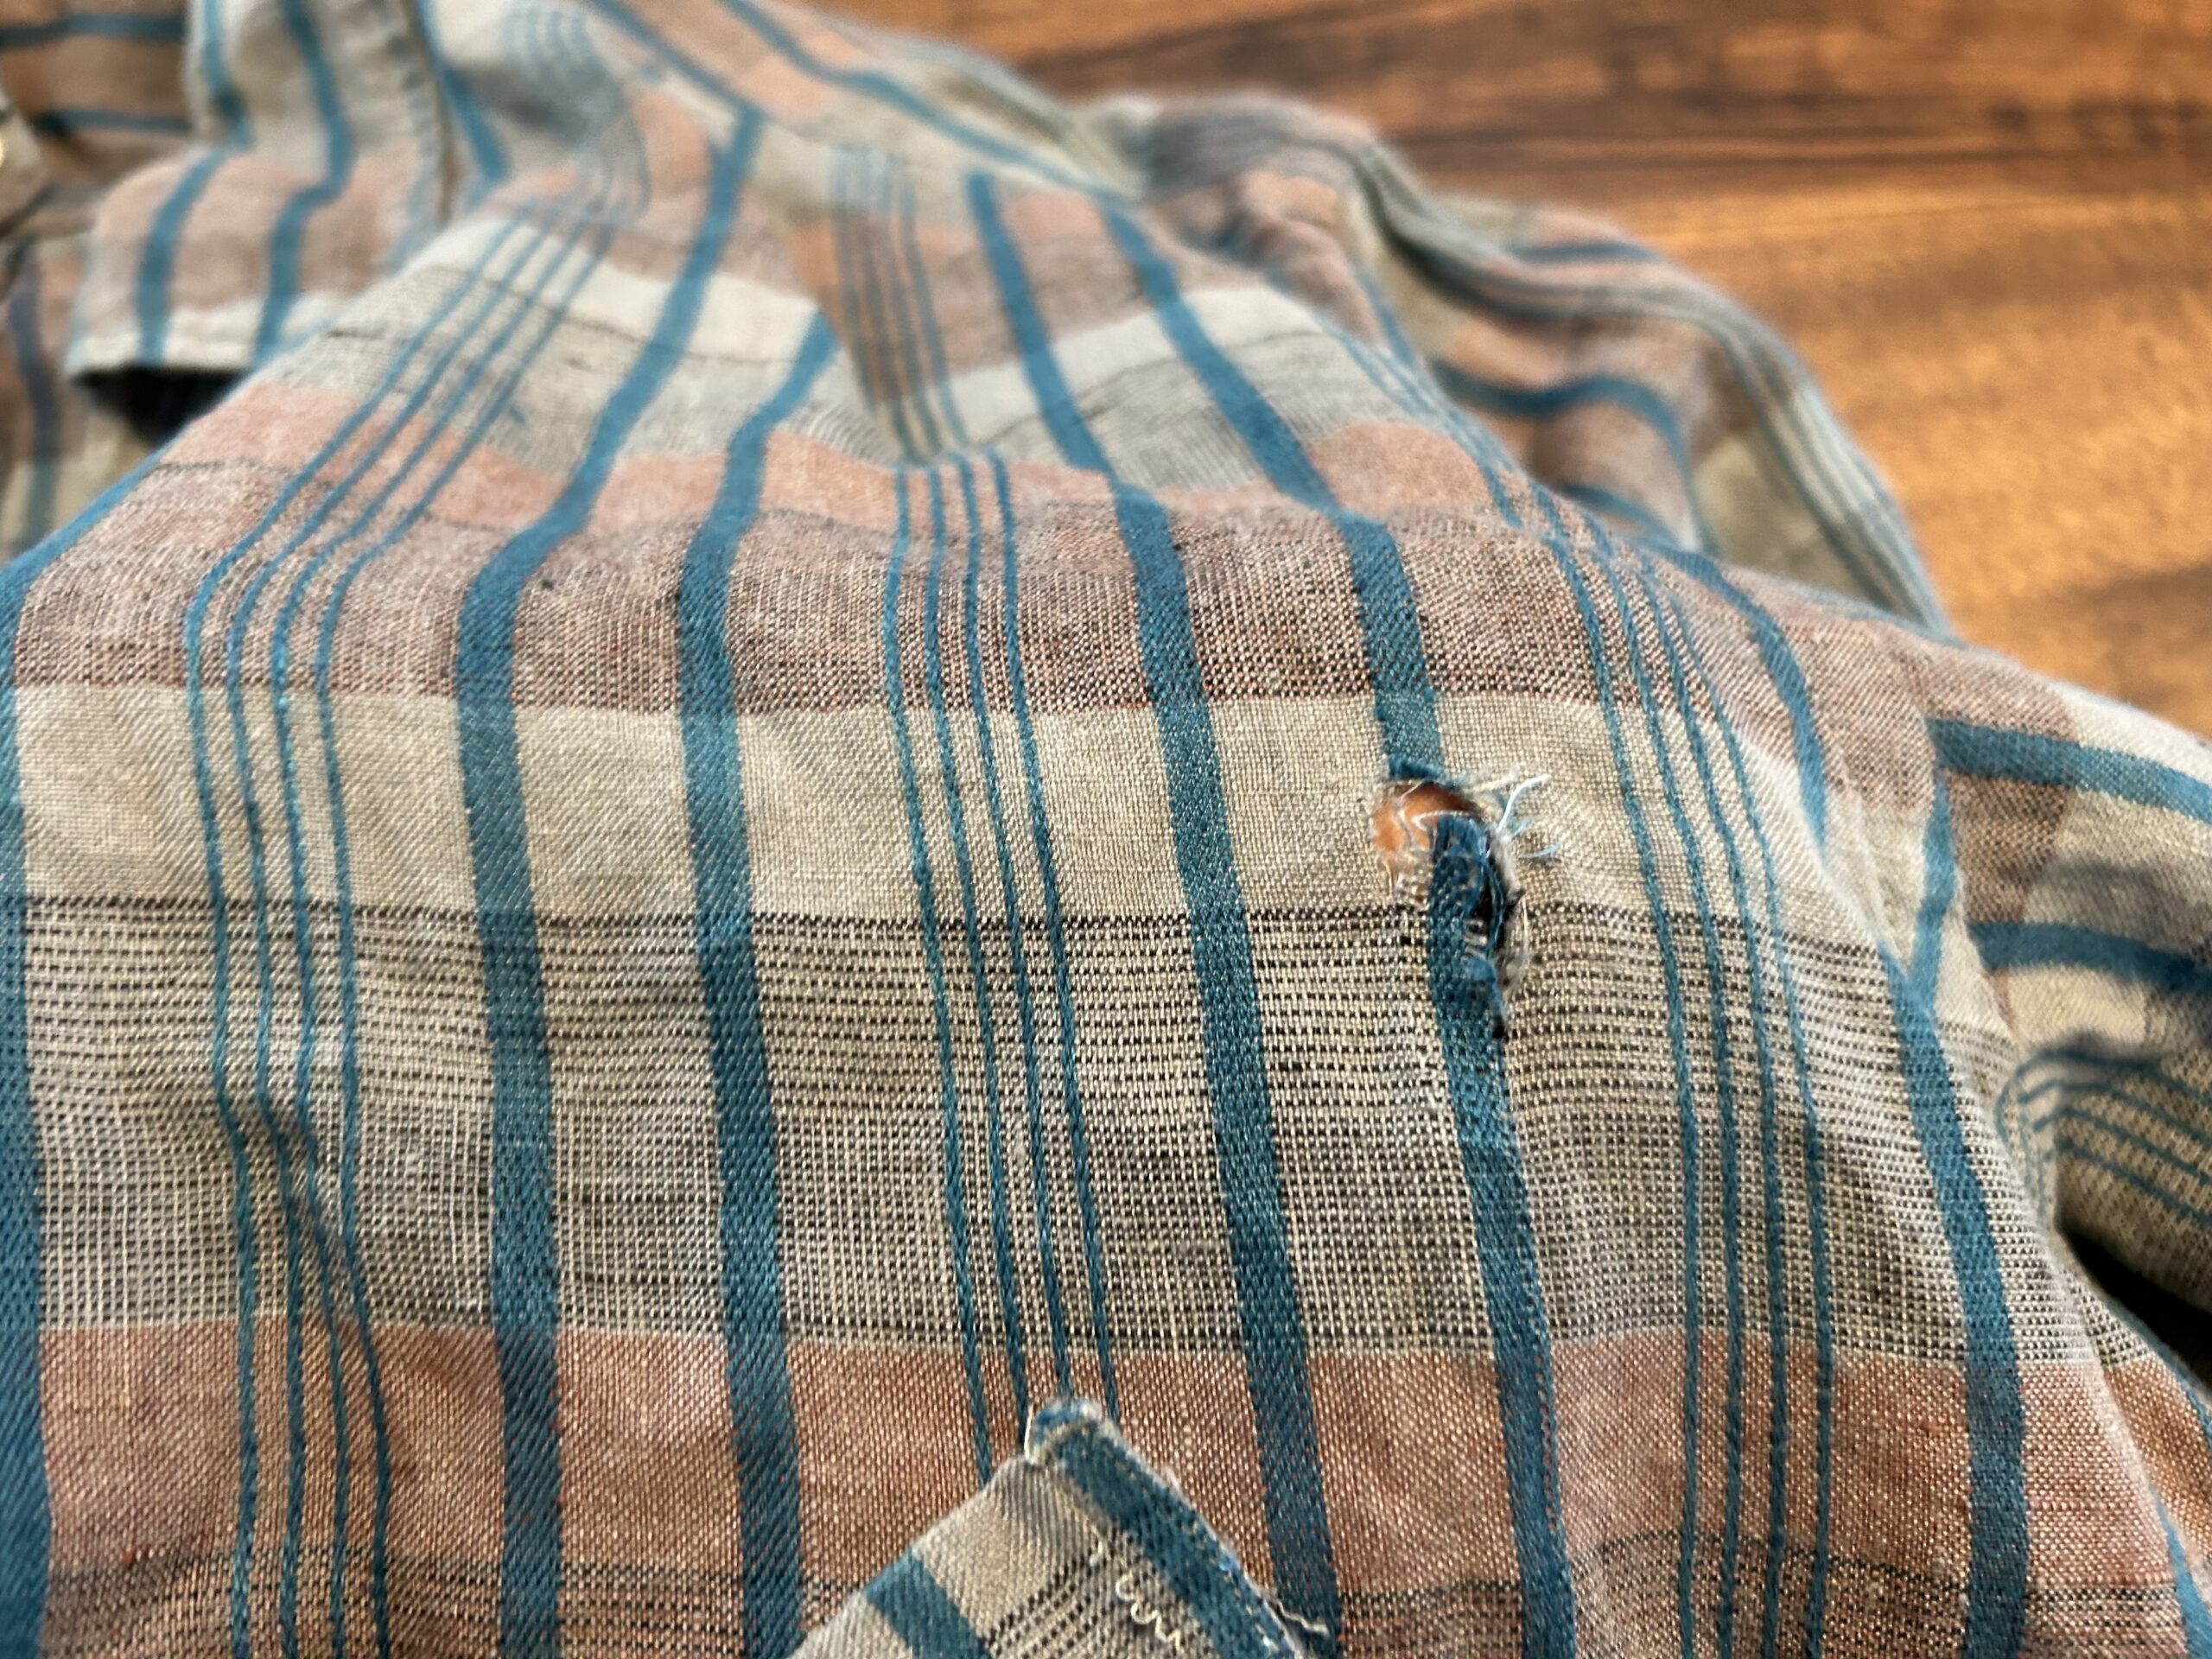
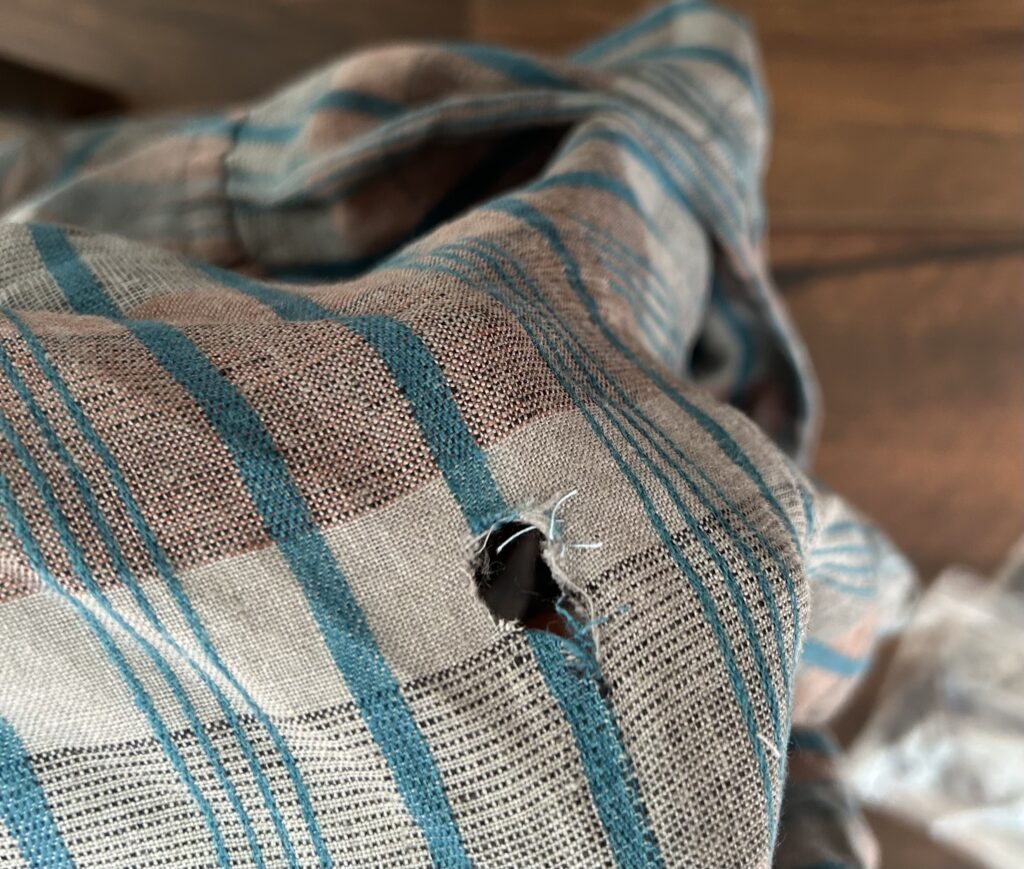
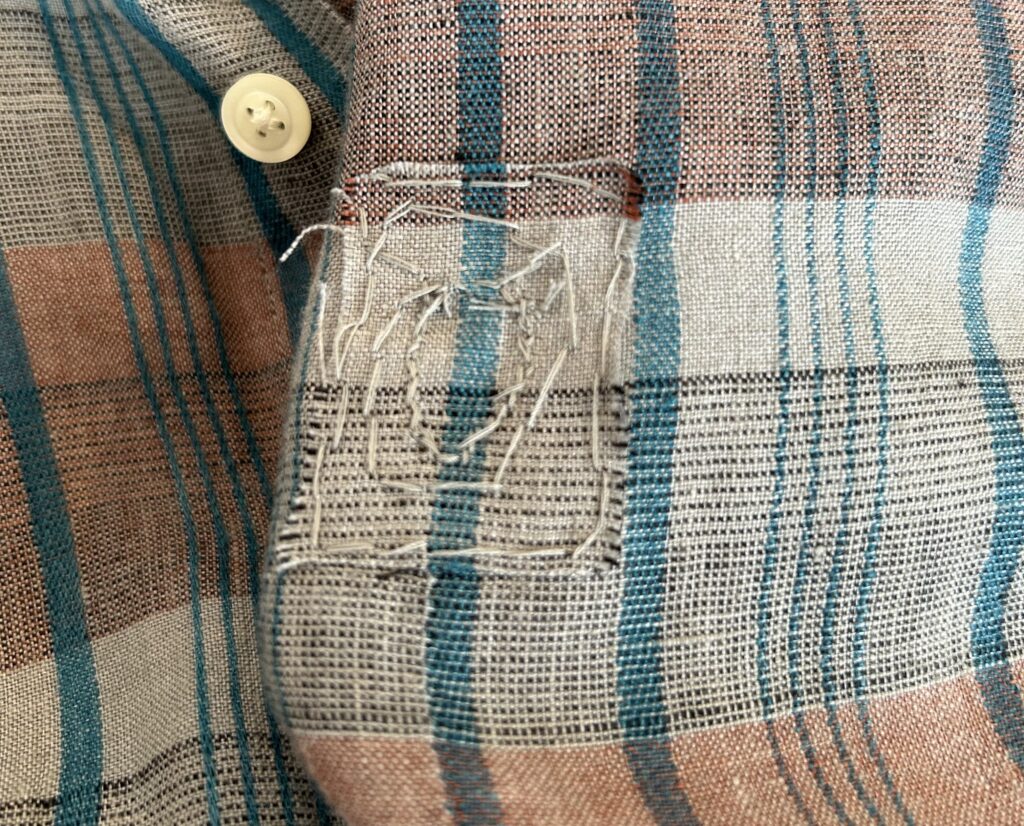
When I removed the pocket, a large hole opened up.
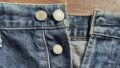
The reason was that the two top corners of the pocket were sewn extremely tightly by machine.
This type of stitching is used in areas that require strength, such as belt loops.
Because this stitching is very strong, it is durable, but it also puts a lot of stress on the fabric underneath.
In some cases, the fabric underneath may already be damaged.
Because I tried to forcibly remove such a heavily reinforced area, the thread did not cut cleanly, and I ended up cutting the fabric underneath as well.
Invisible mending or patching with another fabric
Even though it was a shirt I bought cheaply at a second-hand shop, giving up and throwing it away without ever wearing it was not an option.
I immediately took it to a reliable local alterations shop run by an elderly lady.
She used to make men’s suits in the past and is extremely knowledgeable about clothing. Whenever I need alterations on ready-made suits, I always go to her.
After looking at the shirt, she presented me with two options.
The first option was invisible mending. Roughly speaking, this method involves reweaving threads into the damaged area. The result is completely unnoticeable, but it requires very high skill, and the cost is close to USD 70 per hole.
The second option was to place another piece of fabric on the back and attach it. This option is cheaper, but traces inevitably remain. In my case especially, because the fabric is checked, using a single thread color means that the stitching will inevitably stand out in some areas.
I said that I didn’t want to spend over that amount, so I preferred the second option. She then said, “You like clothes, don’t you? Then I’ll teach you how to do it, so try it yourself.”
Not only did she teach me, but she also gave me the necessary adhesive sheets and perfectly matching thread for free. She was so kind it almost brought me to tears.
Specific repair method
The repair process consists of two main steps.
① Place leftover pocket fabric behind the hole so the pattern matches, sandwich a heat-activated adhesive sheet between them, and press at high temperature with an iron.
↓
② To prevent the leftover fabric from peeling off during washing, sew it in place with thread.
I will now explain these two steps in more detail, breaking them down step by step.
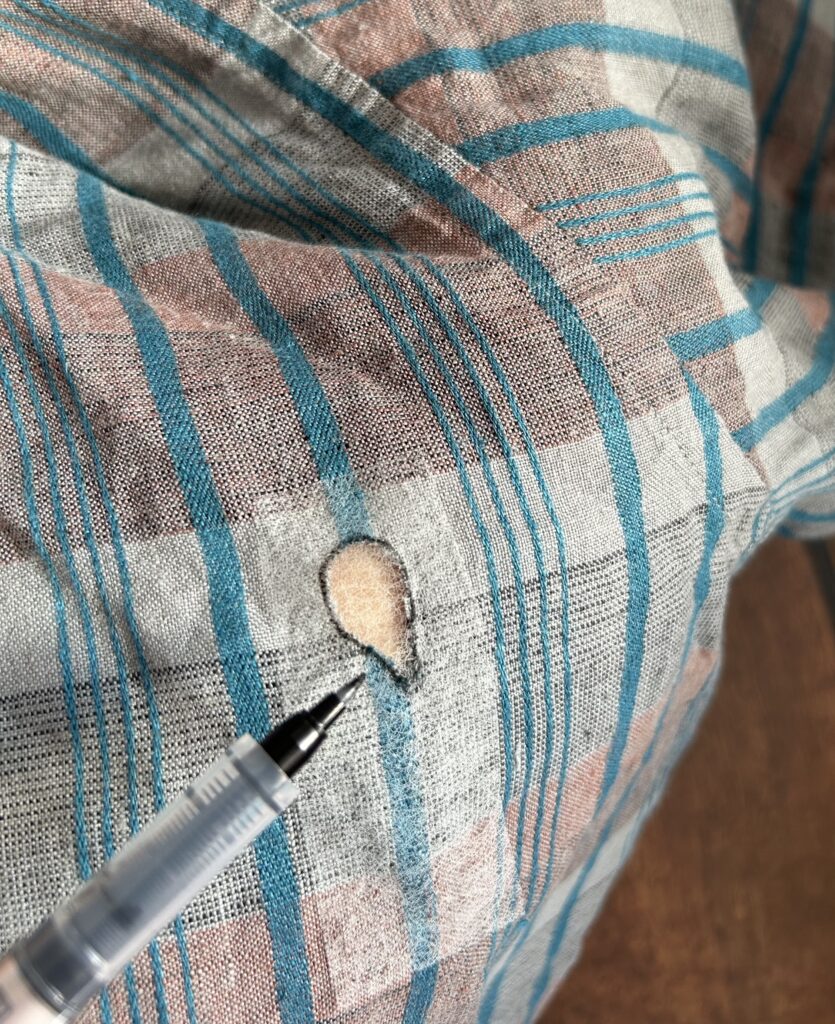
First, trim away the frayed threads around the hole to clearly define its edges.

↓
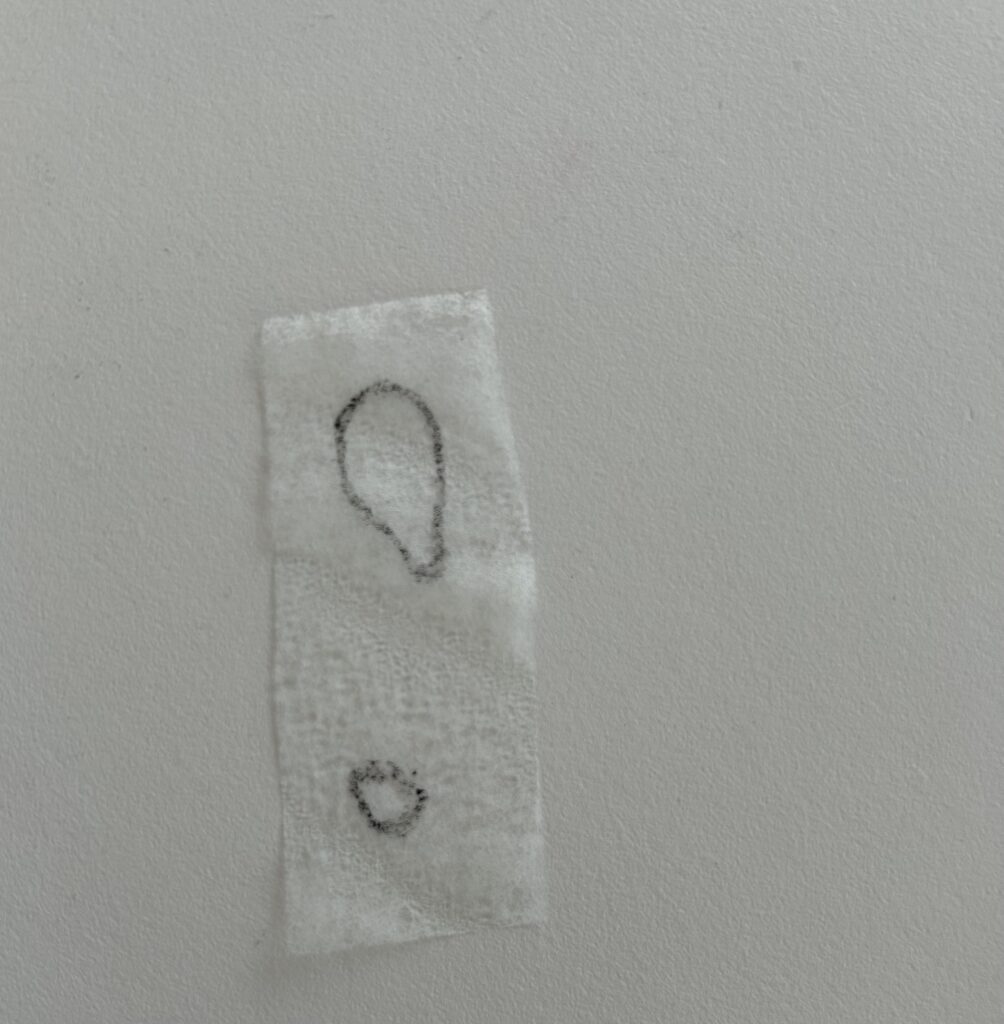
Mark the adhesive sheet with a marker to match the shape of the hole, then cut it out accordingly. (If you don’t cut it out, the adhesive will seep to the surface and become sticky.)
↓
Cut the leftover pocket fabric to about 2 cm (0.8 inches) around the area that matches the pattern of the hole. (It should be roughly the same size as the adhesive sheet.)
↓
Layer the shirt body, adhesive sheet, and leftover fabric from bottom to top, then press with an iron at high temperature.

↓
Once the leftover fabric is bonded, sew around it for reinforcement. It is best to sew both around the leftover fabric and around the hole.
↓
The key point when sewing is how much you can hide the thread on the front side. Insert the needle from the back, then insert it again from the front just one thread away from where it emerged. The hole itself is noticeable, but the thread is barely visible.
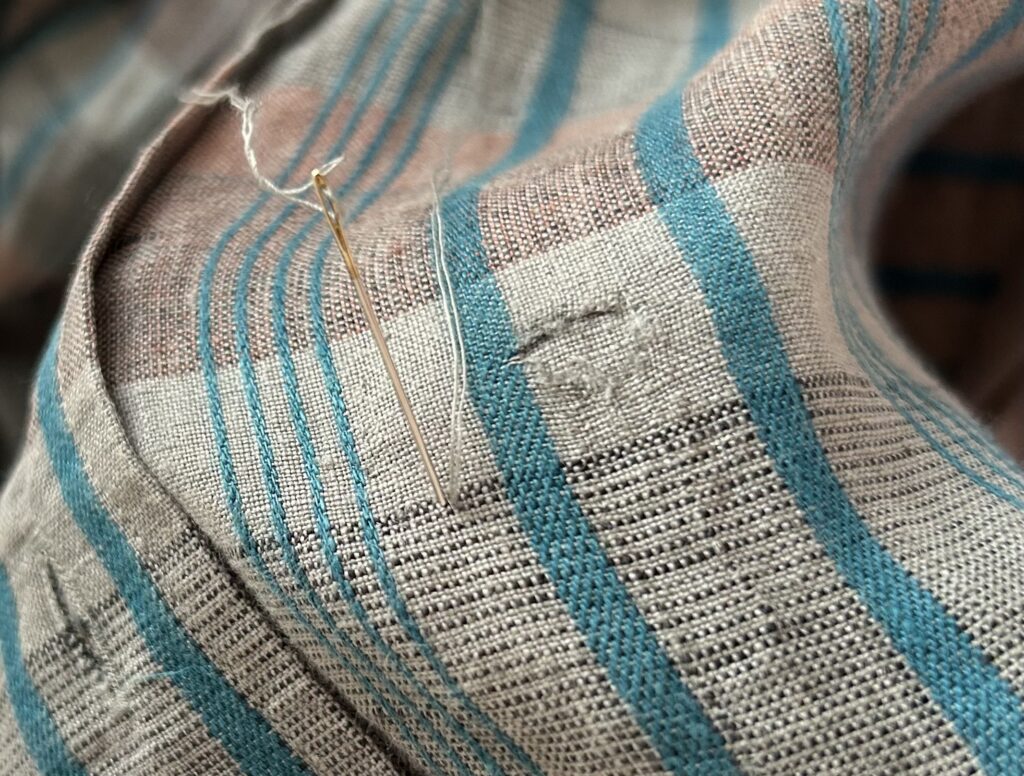
The area around the hole is sewn for reinforcement to prevent fraying from spreading, but even if the thread is unobtrusive, the shape of the hole itself inevitably remains visible.
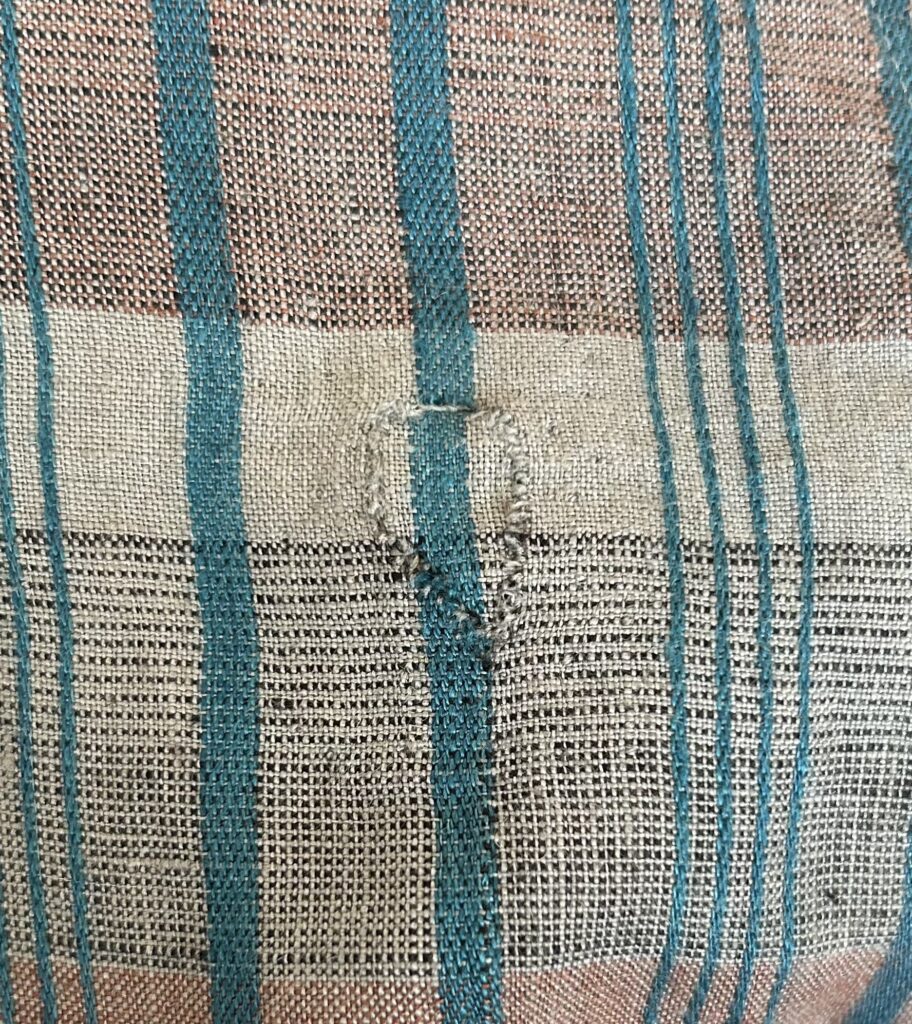
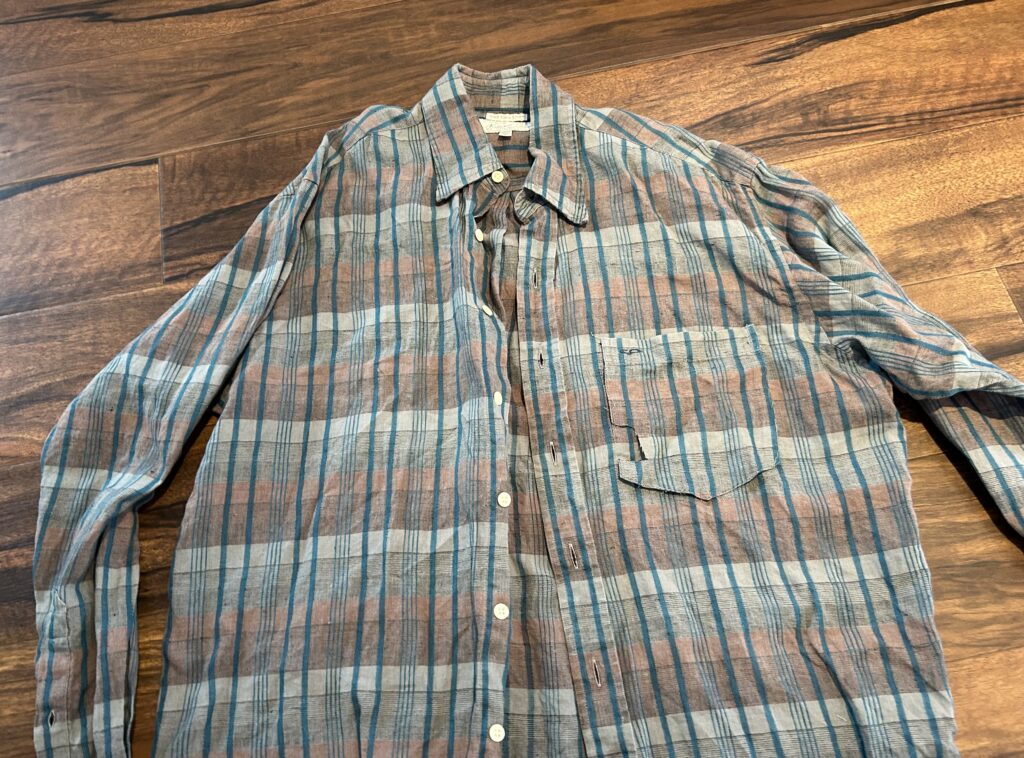
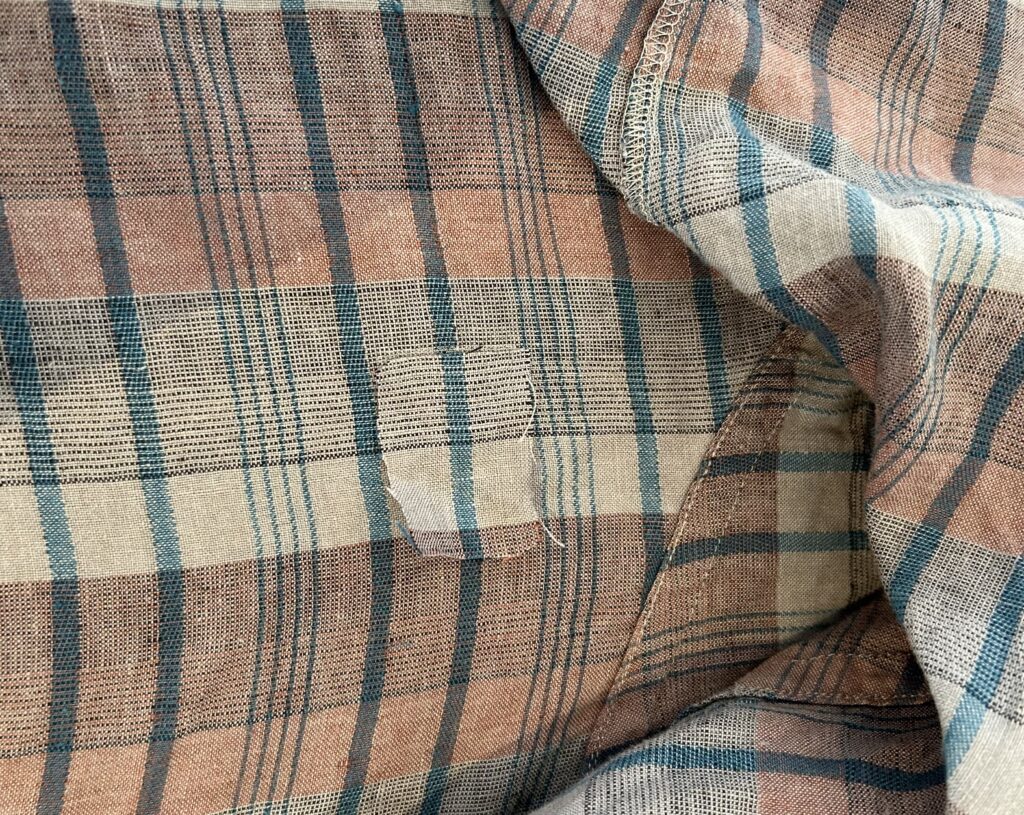
This completes the repair.
The repair blends into the check pattern, and the wrinkles of the linen help disguise it by about half. You can see it if you look closely, but the result is good enough that I feel comfortable wearing it outside.

Conclusion
If you find yourself thinking, “This shirt is great, but the chest pocket is annoying,” I want to tell you first and foremost that you can simply remove it.
Removing a chest pocket is very easy.
If you feel even a little uneasy during the process, I recommend stopping instead of forcing your way through as I did, and taking the shirt to a professional alterations shop.
I am extremely satisfied that I was able to repair it this well for free, and I am deeply grateful to the elderly lady at the alterations shop.
That’s all. Thank you for reading.
コメント